Seal Those Drafts
In the humidifier post, we discussed how a house with dry air is a drafty house. But not all drafts are from dry air. If your house is 20+ years old, chances are it's drafty. And if it's 60+ years old, it's down right breezy. Our house is 140 years old. You can imagine. A book - Renovating Old Houses by George Nash - states that most older houses have enough gaps for cold air to infiltrate equal to leaving your front door open 24 hours a day. When you really only need about a half an air exchange an hour, does it make sense to knowingly allow this much COLD air come waltzing through your home?
Fortunately, there are things you can do to alleviate many of the drafts - and all from the warmth of inside the house
Here in upstate NY, we just experienced the coldest air mass in the last 5 years. My guess is, you felt drafts that you had no clue existed. I know I'm finding them. So - ditch the sweater. You'll be getting warm doing this work
Basically, what you'll be doing is going around the house feeling for drafts. Everything is suspect - outlets, switches, doors, windows, pipes and the foundation are all bound to have a stream or river of cold air falling from them
Materials
I tend to keep things really simple for my sake. Depending on how indepth you decide to get with this project (s), you'll need most of these.
 Hammer
Flat head screw driver
Calk - silicone clear
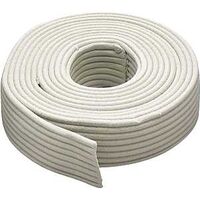
rope calk
Foam outlet and switch seals
Windows
Do you still have the old sashed windows? You know, the ones with the ropes and weights inside the woodword. We still have 6. Fortunately, only 3 are really vulnerable to the brutal NW wind, but that doesn't mean the others aren't leaking. (Here) is a video and written instructions on how to insulate these. It works! I've tried it.

If you have newer windows, they still probably leak some. You can feel around the woodwork, or use a stick of burning incense to find the leaks. Chances are, if there is open space between the woodwork and the wall, you'll see the smoke plummet toward the floor. If the smoke does anything more than waft along you have a leak. This means you have to get the calk out.
I prefer clear silicone calk. It blends in well, is paintable and remains flexible for years. But if you have a type you prefer, please use that instead. When you do begin caulking, PUSH the tube. Pulling it stretches it and doesn't get it worked into the crack. By pushing the tube, you get it worked into the crack and a far better looking bead. I wasn't a believer, but have become one since having to do a lot of calking
Repeat this process with all of your windows, not just the ones facing North or NW. It's just as cold on the South side of your house as it is the North. The air will still leak in, even if it isn't forced by the wind
Switches and Outlets

Now that you've finished the windows, it's time to relight the incense and check all of your outlets and switches. Since there should be at least 1 switch per room and an outlet about every 6', there will be plenty of checking to do. Check interior walls as well as exterior. You'd be surprised at how cool that air can be as well.
Remove all of the plates and take your incense around. Chances are you will be appalled by the amount of air moving through these tiny spaces.
Use your calk (it's non-conductive) around the outside of the boxes. Never put anything inside the box itself. It's dangerous and against codes. Most drywall is not 100% snug around the boxes, so you need to seal that space. If you think there's enough room, place some fiberglass insulation around it first, and then seal the gap.
Next, take a foam seal you bought in a packet of at least a dozen for about $2 and place it around the outlet. Then, replace the wall plate, covering all of your work.
Repeat this procedure for all outlets and switches. It's time consuming, but so worth it! This alone can save you at least 2% on your heating and cooling bills, not to mention the comfort of your home improving massively.
Doors
I hate doors. Our entire house isn't square, and moves with the seasons, so the doors are almost impossible to keep sealed well. But that doesn't stop me from trying!

Check the weather stripping. If it's not pliable, or is cracked, you should replace it. Thankfully, this is inexpensive and easy to do. Replacement kits exist in every home-improvement store. If I can do this in less than an hour, it's easy.
Once you've checked your weather stripping, check the woodwork around your door. Often, it is like the windows, and not sealed properly. Use your calk to seal any leaks surrounding the woodwork.
And if your house IS like mine and the doors aren't set squarely, you may be able to solve some of this issue with shims behind the hinges, or even replacing the hingest themselves. I've done both to 2 different doors with great success. Both doors seal far better and work better. They latch well year 'round.
Foundation
 Anytime there is a change in materials, you have the chance at air leakage. And so it goes with your foundation. This is where blocks or cement meet wood. If you are able to get to this portion of your house, you can use the expanding foam in the spaces. You can also use calk, if the leaks are small. The foam is nice for it adds R-value, and expands to fill larger spaces, or spaces you can fully reach with the calk gun.
As long as you are in your basement/cellar, look at your window and door casings here as well. Even if it is unfinished as a living space, you will still be affected by its temperature. You don't want or need cold air under your living space. Cold floors are uncomfortable.
Once you've finished with the windows and doors of your basement, look up. You have pipes and ducts going through the subflooring into your living space. Again, like the outlet boxes, it's rare for these to be sealed well, allowing air to travel along them into your living space. Depending on the size of the spaces, use calk or the spray foam to fill the gaps.
Roof
The one area of your house you WANT air flow is your roof. Keep soffit vents, peak vents and ridge vents open. Your roof needs to breath to keep from rotting. This doesn't mean it shouldn't be insulated, but the airflow is critical to the health of the roof and the house.
Finished!
Now that you've finished this work, you have now saved a full 5% on your heat bill and maybe more, depending on your leaks. Your home is far more comfortable and for little effort or money. That, to me, is the most satisfying! The last 2 days had me calking leaks that equalled nearly 1 square foot. The two rooms I worked in are now 3 degrees warmer. THAT is what this post is about.
Fortunately, there are things you can do to alleviate many of the drafts - and all from the warmth of inside the house
Here in upstate NY, we just experienced the coldest air mass in the last 5 years. My guess is, you felt drafts that you had no clue existed. I know I'm finding them. So - ditch the sweater. You'll be getting warm doing this work
Basically, what you'll be doing is going around the house feeling for drafts. Everything is suspect - outlets, switches, doors, windows, pipes and the foundation are all bound to have a stream or river of cold air falling from them
Materials
I tend to keep things really simple for my sake. Depending on how indepth you decide to get with this project (s), you'll need most of these.
HammerFlat head screw driver
Calk - silicone clear
rope calk
Foam outlet and switch seals
Windows
Do you still have the old sashed windows? You know, the ones with the ropes and weights inside the woodword. We still have 6. Fortunately, only 3 are really vulnerable to the brutal NW wind, but that doesn't mean the others aren't leaking. (Here) is a video and written instructions on how to insulate these. It works! I've tried it.
If you have newer windows, they still probably leak some. You can feel around the woodwork, or use a stick of burning incense to find the leaks. Chances are, if there is open space between the woodwork and the wall, you'll see the smoke plummet toward the floor. If the smoke does anything more than waft along you have a leak. This means you have to get the calk out.
I prefer clear silicone calk. It blends in well, is paintable and remains flexible for years. But if you have a type you prefer, please use that instead. When you do begin caulking, PUSH the tube. Pulling it stretches it and doesn't get it worked into the crack. By pushing the tube, you get it worked into the crack and a far better looking bead. I wasn't a believer, but have become one since having to do a lot of calking
Repeat this process with all of your windows, not just the ones facing North or NW. It's just as cold on the South side of your house as it is the North. The air will still leak in, even if it isn't forced by the wind
Switches and Outlets
Now that you've finished the windows, it's time to relight the incense and check all of your outlets and switches. Since there should be at least 1 switch per room and an outlet about every 6', there will be plenty of checking to do. Check interior walls as well as exterior. You'd be surprised at how cool that air can be as well.
Remove all of the plates and take your incense around. Chances are you will be appalled by the amount of air moving through these tiny spaces.
Use your calk (it's non-conductive) around the outside of the boxes. Never put anything inside the box itself. It's dangerous and against codes. Most drywall is not 100% snug around the boxes, so you need to seal that space. If you think there's enough room, place some fiberglass insulation around it first, and then seal the gap.
Next, take a foam seal you bought in a packet of at least a dozen for about $2 and place it around the outlet. Then, replace the wall plate, covering all of your work.
Repeat this procedure for all outlets and switches. It's time consuming, but so worth it! This alone can save you at least 2% on your heating and cooling bills, not to mention the comfort of your home improving massively.
Doors
I hate doors. Our entire house isn't square, and moves with the seasons, so the doors are almost impossible to keep sealed well. But that doesn't stop me from trying!
Check the weather stripping. If it's not pliable, or is cracked, you should replace it. Thankfully, this is inexpensive and easy to do. Replacement kits exist in every home-improvement store. If I can do this in less than an hour, it's easy.
Once you've checked your weather stripping, check the woodwork around your door. Often, it is like the windows, and not sealed properly. Use your calk to seal any leaks surrounding the woodwork.
And if your house IS like mine and the doors aren't set squarely, you may be able to solve some of this issue with shims behind the hinges, or even replacing the hingest themselves. I've done both to 2 different doors with great success. Both doors seal far better and work better. They latch well year 'round.
Foundation
Anytime there is a change in materials, you have the chance at air leakage. And so it goes with your foundation. This is where blocks or cement meet wood. If you are able to get to this portion of your house, you can use the expanding foam in the spaces. You can also use calk, if the leaks are small. The foam is nice for it adds R-value, and expands to fill larger spaces, or spaces you can fully reach with the calk gun.As long as you are in your basement/cellar, look at your window and door casings here as well. Even if it is unfinished as a living space, you will still be affected by its temperature. You don't want or need cold air under your living space. Cold floors are uncomfortable.
Once you've finished with the windows and doors of your basement, look up. You have pipes and ducts going through the subflooring into your living space. Again, like the outlet boxes, it's rare for these to be sealed well, allowing air to travel along them into your living space. Depending on the size of the spaces, use calk or the spray foam to fill the gaps.
Roof
The one area of your house you WANT air flow is your roof. Keep soffit vents, peak vents and ridge vents open. Your roof needs to breath to keep from rotting. This doesn't mean it shouldn't be insulated, but the airflow is critical to the health of the roof and the house.
Finished!
Now that you've finished this work, you have now saved a full 5% on your heat bill and maybe more, depending on your leaks. Your home is far more comfortable and for little effort or money. That, to me, is the most satisfying! The last 2 days had me calking leaks that equalled nearly 1 square foot. The two rooms I worked in are now 3 degrees warmer. THAT is what this post is about.
Labels: article, Conserve, energy star, heating, reduce
posted by Leslie at
5:52 PM
![]()
![]()


0 Comments:
Post a Comment
Subscribe to Post Comments [Atom]
<< Home