The Spiraling Homestead

Friday, December 11, 2009

Heating Your Home For Less

When winter chills get your teeth chattering, one way to stay warm--and save money on heating bills---is to throw on a pair of wool socks, some sweaters, winter boots and a hat, but who wants to do that while lounging at home? We certainly don't.

Therefore, we did some digging and came up with effective ways to help you maximize warmth and reduce your monthly expenditures.

The Energy Information Administration (EIA) predicts that a typical U.S. household will spend less money on heating bills between October of this year and March of 2010 due to milder weather and lower cost of natural gas. The EIA's projected average of $960-although about 8 percent less than last winter's average of $1,044-is still quite high, especially in today's economy. And let's face it: many homeowners have already surpassed the amount in just two months.

In order to start saving money now, it is essential that you purchase a programmable thermostat and lower your temperature during the night and during the time you are usually out of the house. If your winter heating bill adds up to $960, that means that from beginning of October to the end of March, you're paying about $192 a month. By turning down the heat about 10 degrees for eight hours each day, you will save around 10 percent on your heating bill, which translates to $19.20 a month or $96 a year. (For our experiment, we turned down the thermostat from 75 degrees Fahrenheit to 65 degrees, from 10 p.m. to 6 a.m.) A programmable thermostat can cost you anywhere from $30-$150 at discounted prices. Let's say you spend $50 on the thermostat. Even after figuring in its cost, you'll still save about $46 on your heating bill your first year.

You can further decrease your heating bills with proper insulation. Although the best option is to insulate the walls of your home and start saving 50-60 percent on your monthly heating bill , the process generally requires a two to three-week renovation and costs approximately $2,000-$3,000, depending on the size of your home. Also, this is done to an owned property and since many of us live in rentals, it won't work for our experiment. However, you can still winterize your home with a bit of DIY work.

According to the U.S. Department of Energy, you can reduce your home's heating costs by up to 30 percent through proper insulation and air sealing methods. First, hold a lit candle to windows and doors on a windy day to test for air leaks. If frosts, water condensation or drafts are present, then you can purchase a heavy-duty clear, plastic sheet and tape it to the inside of your windows. This will cost about $10, depending on the number and size of windows in your home. (I usually purchase a clear, polyethylene sheeting at Home Depot for $8.28 and 3M duct tape for $2, so my total comes out to $10.28.) In addition, make sure to keep your bedroom doors closed. You can put old towels or blankets at the bottom of your doors to keep out cold air.

After properly winterizing your home, you can lower the thermostat 5 more degrees to a comfortable temperature of 60 degrees Fahrenheit. In total, you will save $28.80 per month ($144 per year) by lowering the thermostat 15 degrees. Figuring in the cost of the thermostat ($50) and the cost of plastic sheeting and duct tape ($10.28), you will save $83.72 your first year.

You can also take a different approach, and lower the thermostat 10 more degrees instead of 5 and then use a space heater to warm up your bedroom to the aforementioned comfortable temperature.

There's no reason why you should have to warm up the entire house when you spend most of your night in only one or two rooms. Therefore, lowering the thermostat to 55 degrees Fahrenheit and purchasing an electric heater to warm up your bedroom(s) might be a better solution. At discount prices, space heaters can cost anywhere from $30 to $100. We recommend programmable space heaters so that they can shut off when the room reaches the desired temperature.

Let's say you spend $50 on a programmable, child-proof electric heater. If you run the programmable space heater in your bedroom for eight hours each night over a period of five months to heat up to 60 degrees Fahrenheit at a setting of 1500 watts, you will use approximately 11 kWh per night (depending how often the heater turns on and off during the night), or 326 kWh per month. At $0.10 per kWh, it would cost about $1 per night or $31 per month, to heat your home.

You will save $38.40 per month ($192 per year) by lowering the thermostat 20 degrees. Figuring in the cost of the thermostat ($50) and the cost of the space heater ($50), in addition to electricity costs for running a space heater each night over a period of five months, or 151 days ($151), you will actually pay $59 more for your heat the first year.

One major caveat is that if your room has air leaks, the space heater will be turned on longer and will run at a higher setting, thus eating up electricity; therefore, you'd still have to properly insulate your apartment before purchasing a space heater. Otherwise, it will work with only 60-70 percent efficiency, as a lot of heat will escape. That means, you'll be spending even more money than you intended.

Another caveat is that if you use more than one electric heater and they run on the same circuit breaker or if you have other heavy-duty electric appliances on the same circuit, you may trip the breakers when the space heaters are turned on at the same time.

Therefore, invest in a programmable thermostat and winterize your home prior to considering the purchase of a space heater, and watch the savings pile up.

Labels: , , ,

Heating Your Home For Less

When winter chills get your teeth chattering, one way to stay warm--and save money on heating bills---is to throw on a pair of wool socks, some sweaters, winter boots and a hat, but who wants to do that while lounging at home? We certainly don't.

Therefore, we did some digging and came up with effective ways to help you maximize warmth and reduce your monthly expenditures.

The Energy Information Administration (EIA) predicts that a typical U.S. household will spend less money on heating bills between October of this year and March of 2010 due to milder weather and lower cost of natural gas. The EIA's projected average of $960-although about 8 percent less than last winter's average of $1,044-is still quite high, especially in today's economy. And let's face it: many homeowners have already surpassed the amount in just two months.

In order to start saving money now, it is essential that you purchase a programmable thermostat and lower your temperature during the night and during the time you are usually out of the house. If your winter heating bill adds up to $960, that means that from beginning of October to the end of March, you're paying about $192 a month. By turning down the heat about 10 degrees for eight hours each day, you will save around 10 percent on your heating bill, which translates to $19.20 a month or $96 a year. (For our experiment, we turned down the thermostat from 75 degrees Fahrenheit to 65 degrees, from 10 p.m. to 6 a.m.) A programmable thermostat can cost you anywhere from $30-$150 at discounted prices. Let's say you spend $50 on the thermostat. Even after figuring in its cost, you'll still save about $46 on your heating bill your first year.

You can further decrease your heating bills with proper insulation. Although the best option is to insulate the walls of your home and start saving 50-60 percent on your monthly heating bill , the process generally requires a two to three-week renovation and costs approximately $2,000-$3,000, depending on the size of your home. Also, this is done to an owned property and since many of us live in rentals, it won't work for our experiment. However, you can still winterize your home with a bit of DIY work.

According to the U.S. Department of Energy, you can reduce your home's heating costs by up to 30 percent through proper insulation and air sealing methods. First, hold a lit candle to windows and doors on a windy day to test for air leaks. If frosts, water condensation or drafts are present, then you can purchase a heavy-duty clear, plastic sheet and tape it to the inside of your windows. This will cost about $10, depending on the number and size of windows in your home. (I usually purchase a clear, polyethylene sheeting at Home Depot for $8.28 and 3M duct tape for $2, so my total comes out to $10.28.) In addition, make sure to keep your bedroom doors closed. You can put old towels or blankets at the bottom of your doors to keep out cold air.

After properly winterizing your home, you can lower the thermostat 5 more degrees to a comfortable temperature of 60 degrees Fahrenheit. In total, you will save $28.80 per month ($144 per year) by lowering the thermostat 15 degrees. Figuring in the cost of the thermostat ($50) and the cost of plastic sheeting and duct tape ($10.28), you will save $83.72 your first year.

You can also take a different approach, and lower the thermostat 10 more degrees instead of 5 and then use a space heater to warm up your bedroom to the aforementioned comfortable temperature.

There's no reason why you should have to warm up the entire house when you spend most of your night in only one or two rooms. Therefore, lowering the thermostat to 55 degrees Fahrenheit and purchasing an electric heater to warm up your bedroom(s) might be a better solution. At discount prices, space heaters can cost anywhere from $30 to $100. We recommend programmable space heaters so that they can shut off when the room reaches the desired temperature.

Let's say you spend $50 on a programmable, child-proof electric heater. If you run the programmable space heater in your bedroom for eight hours each night over a period of five months to heat up to 60 degrees Fahrenheit at a setting of 1500 watts, you will use approximately 11 kWh per night (depending how often the heater turns on and off during the night), or 326 kWh per month. At $0.10 per kWh, it would cost about $1 per night or $31 per month, to heat your home.

You will save $38.40 per month ($192 per year) by lowering the thermostat 20 degrees. Figuring in the cost of the thermostat ($50) and the cost of the space heater ($50), in addition to electricity costs for running a space heater each night over a period of five months, or 151 days ($151), you will actually pay $59 more for your heat the first year.

One major caveat is that if your room has air leaks, the space heater will be turned on longer and will run at a higher setting, thus eating up electricity; therefore, you'd still have to properly insulate your apartment before purchasing a space heater. Otherwise, it will work with only 60-70 percent efficiency, as a lot of heat will escape. That means, you'll be spending even more money than you intended.

Another caveat is that if you use more than one electric heater and they run on the same circuit breaker or if you have other heavy-duty electric appliances on the same circuit, you may trip the breakers when the space heaters are turned on at the same time.

Therefore, invest in a programmable thermostat and winterize your home prior to considering the purchase of a space heater, and watch the savings pile up.

Labels: , , ,

Saturday, January 24, 2009

Windows, The Weak Link


In the history of man, it's been only a little more than a millenia that we've had the luxury of seeing out of our shelter without the frigid blast of winter or furnace wave of summer filling the abode.

But the technology of glass, or other transparent building material has come to a virtual stand still. Yes, there are single, double and even triple pane windows - with or without inert gas or films applied. But with all of these minimal changes made to the making and use of glass, it is still the weak link in keeping a house heated and cooled.

And yet, we have increased its use substantially. 20 years ago, the general rule was for window space to be 10 % of your floor space. So if you had a 1000 sf home, you would require 100 sf of window space. That number has jumped to 15% - 18% and many homes approach a phenominal 30%. The problem is, with every 3% increase in window space, a 2% reduction in heating and cooling efficiency is realized.

How Weak

Beyond that, walls account for 30% of all heat loss from a home, but are easily 3 times the surface area of windows. Windows account for 20% of all heat loss - using 1/3 the space of the walls, they accomplish a heat transfer at least 60% more efficient than the walls. This is an efficiency we can ill afford.

Another way to look at this idea is that walls are now insulated to at least an R-20. Windows, on their own, max out at R-4.5. This is with the most expensive and most efficient windows on the market today. Hardly what the majority of homes have.

There are several things you can do to improve the R-value (there's a thing called the U-value, but I'm not going to confuse this discussion even more) of your windows. Curtains and drapes aren't really helping you. Unless they are an actual window cover that fits tightly within the window's woodwork, they are little more than - oh - window dressing!

I'll try to organize the suggestions in an order that is from least to most extreme, with many of them being equal.

Metal Windows

Metal windows are by far, the most inefficient beast man has made. The metal frame is the most effective "cold bridge", even over cold air itself. It conducts heat and cold (don't fight with me physics folks, I know) so efficiently, that it's a wonder anyone considered metal frames a great idea.

You must make a barrier for these windows both inside the wall and inside the living space. Inside the wall, place rigid foam or expanding spray foam so it is covering the entire metal frame - or the wood that surrounds it, so that it doesn't touch any other aspect of the wall - drywall or wood. This will block it from conducting heat or cold to the surrounding wall space. Outside the wall, but within the living space, make a plexi or rigid plastic "storm window" with a rubber or foam gasket that will cover the entire window space, and the gasket covering the entire outer edge of the metal frame. This will accomplish the much needed air space and block the metal from conducting the cold to the interior of the room

All Other Windows

Air Spaces

The more air spaces you have, the more insulating ability you have. This includes windows, blinds and drapes. You can add a storm windows or shutters (that are more than decoration) to the outside of the home. You can add a plastic film, blinds, shutters, shades, drapes and rigid foam inserts to the inside. They all must make direct contact with the window frame to be of any use, but with that simple rule, you can achieve a great deal with any, or all of these ideas.

Blinds

All types of blinds are very effective at creating an airspace between the living area and the window. But again, they must be a good fit, which often means the must be custom made. Metal blinds aren't effective, due to the conductivity of heat and cold, but they have long since gone out of style, and are most likely not made anymore. So no worries.

Shades

Some shades are good, if made of a tight-weave fabric or of segmented wood. The types made out of sea grass or reeds are too loosely woven to be effective at making that air space.

Drapes

Again, these must be made of a tight weave, or have a liner made of a tight weave and must make a solid connection to the wood frame surround all 4 sides of the window. If not, the air is free to move. With the air cooling between the drape and the window, a strong current is established, making a very effective air conditioner during a season you least want it.

Insulated drapes are another step within using drapes. You can purchase these in stores or catalogs or you can make them yourself. The more layers within each drape - again for the highest number of air spaces - the better they will work for you.

Shutters

Interior and exterior shutters will work virtually the same, except exterior can protect the glass during a storm, and bring partial or full shade to the glassed area, cutting down on the green house effect during the summer. For heating purposes, they must be create a tight bond covering the glass space.

Rigid Foam

These can be made of any thickness rigid foam insulation you find at the home improvement store. It should be cut to size for each window, so that it fits snuggly within the window frame. It would be put in palce and removed just as curtains are drawn or opened on a daily basis.

This suggestion is the most extreme and I would only recommend this for the coldest of homes or buildings that have many rooms unused for much of the week. It's laborious and these fillers take up a significant amount of space and need to be stored during the day or pleasant weather. Again, for the buildings with many unused rooms, these are also appropriate during the summer, to keep heat OUT.

Radiant Barriers

Radiant barriers can be used individually or incorporated into any of the above suggestions. The material can be styled like mylar, can be a bubble-style insulation with the radiant barrier on one or both sides, or can be similar to material, with nylon strands incorporated within it. You can find these materials online or in home improvement stores. Since it works like it says, it will radiate (or reflect) the heat back to wherever it came from. This can be outside during the summer, or inside during the winter. When used in walls, it has a 97% reflectivity rating, making it incredibly effective in maintaining the temperature in a house. Which means, it can be similarly effective with your windows!
Storm Windows
Most of us already have storm windows on our homes, if not the ever-coveted replacement windows. But if not, seriously consider them. They are a cheaper alternative to replacement windows and most likely will do more good since the air space is larger.
Savings
And while it truly depends on which of these suggestions, or even which combination of suggestions you choose to use in your home as to how much heat you save. Count on it being at least 5%, which is often enough to pay for any of these suggestions within 2 years.
Note
Note that I did not suggest replacing your windows. Unless they are metal framed or the rope-sashed windows, it's difficult to advocate replacing them. Adding storm windows, if done properly, is as effective, due to the larger air space between window panes. Many people are unable to afford replacement windows, and so feel they have no options to save money. But they do. And if you have been able to replace your windows, you still have much to do to make those windows as efficient as they should be. They are not stopping the heat from escaping from your house. They're just slowing it down a little bit compared to your old windows.

Labels: , , ,

Tuesday, January 20, 2009

Seal Those Drafts

In the humidifier post, we discussed how a house with dry air is a drafty house. But not all drafts are from dry air. If your house is 20+ years old, chances are it's drafty. And if it's 60+ years old, it's down right breezy. Our house is 140 years old. You can imagine. A book - Renovating Old Houses by George Nash - states that most older houses have enough gaps for cold air to infiltrate equal to leaving your front door open 24 hours a day. When you really only need about a half an air exchange an hour, does it make sense to knowingly allow this much COLD air come waltzing through your home?

Fortunately, there are things you can do to alleviate many of the drafts - and all from the warmth of inside the house

Here in upstate NY, we just experienced the coldest air mass in the last 5 years. My guess is, you felt drafts that you had no clue existed. I know I'm finding them. So - ditch the sweater. You'll be getting warm doing this work

Basically, what you'll be doing is going around the house feeling for drafts. Everything is suspect - outlets, switches, doors, windows, pipes and the foundation are all bound to have a stream or river of cold air falling from them

Materials

I tend to keep things really simple for my sake. Depending on how indepth you decide to get with this project (s), you'll need most of these.
Hammer
Flat head screw driver
Calk - silicone clear
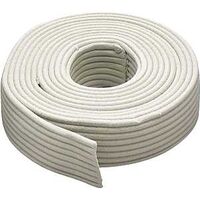
rope calk
Foam outlet and switch seals


Windows

Do you still have the old sashed windows? You know, the ones with the ropes and weights inside the woodword. We still have 6. Fortunately, only 3 are really vulnerable to the brutal NW wind, but that doesn't mean the others aren't leaking. (Here) is a video and written instructions on how to insulate these. It works! I've tried it.

If you have newer windows, they still probably leak some. You can feel around the woodwork, or use a stick of burning incense to find the leaks. Chances are, if there is open space between the woodwork and the wall, you'll see the smoke plummet toward the floor. If the smoke does anything more than waft along you have a leak. This means you have to get the calk out.

I prefer clear silicone calk. It blends in well, is paintable and remains flexible for years. But if you have a type you prefer, please use that instead. When you do begin caulking, PUSH the tube. Pulling it stretches it and doesn't get it worked into the crack. By pushing the tube, you get it worked into the crack and a far better looking bead. I wasn't a believer, but have become one since having to do a lot of calking

Repeat this process with all of your windows, not just the ones facing North or NW. It's just as cold on the South side of your house as it is the North. The air will still leak in, even if it isn't forced by the wind

Switches and Outlets

Now that you've finished the windows, it's time to relight the incense and check all of your outlets and switches. Since there should be at least 1 switch per room and an outlet about every 6', there will be plenty of checking to do. Check interior walls as well as exterior. You'd be surprised at how cool that air can be as well.

Remove all of the plates and take your incense around. Chances are you will be appalled by the amount of air moving through these tiny spaces.

Use your calk (it's non-conductive) around the outside of the boxes. Never put anything inside the box itself. It's dangerous and against codes. Most drywall is not 100% snug around the boxes, so you need to seal that space. If you think there's enough room, place some fiberglass insulation around it first, and then seal the gap.

Next, take a foam seal you bought in a packet of at least a dozen for about $2 and place it around the outlet. Then, replace the wall plate, covering all of your work.

Repeat this procedure for all outlets and switches. It's time consuming, but so worth it! This alone can save you at least 2% on your heating and cooling bills, not to mention the comfort of your home improving massively.

Doors

I hate doors. Our entire house isn't square, and moves with the seasons, so the doors are almost impossible to keep sealed well. But that doesn't stop me from trying!

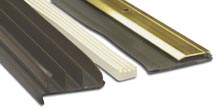
Check the weather stripping. If it's not pliable, or is cracked, you should replace it. Thankfully, this is inexpensive and easy to do. Replacement kits exist in every home-improvement store. If I can do this in less than an hour, it's easy.

Once you've checked your weather stripping, check the woodwork around your door. Often, it is like the windows, and not sealed properly. Use your calk to seal any leaks surrounding the woodwork.

And if your house IS like mine and the doors aren't set squarely, you may be able to solve some of this issue with shims behind the hinges, or even replacing the hingest themselves. I've done both to 2 different doors with great success. Both doors seal far better and work better. They latch well year 'round.

Foundation

Anytime there is a change in materials, you have the chance at air leakage. And so it goes with your foundation. This is where blocks or cement meet wood. If you are able to get to this portion of your house, you can use the expanding foam in the spaces. You can also use calk, if the leaks are small. The foam is nice for it adds R-value, and expands to fill larger spaces, or spaces you can fully reach with the calk gun.


As long as you are in your basement/cellar, look at your window and door casings here as well. Even if it is unfinished as a living space, you will still be affected by its temperature. You don't want or need cold air under your living space. Cold floors are uncomfortable.

Once you've finished with the windows and doors of your basement, look up. You have pipes and ducts going through the subflooring into your living space. Again, like the outlet boxes, it's rare for these to be sealed well, allowing air to travel along them into your living space. Depending on the size of the spaces, use calk or the spray foam to fill the gaps.

Roof

The one area of your house you WANT air flow is your roof. Keep soffit vents, peak vents and ridge vents open. Your roof needs to breath to keep from rotting. This doesn't mean it shouldn't be insulated, but the airflow is critical to the health of the roof and the house.

Finished!

Now that you've finished this work, you have now saved a full 5% on your heat bill and maybe more, depending on your leaks. Your home is far more comfortable and for little effort or money. That, to me, is the most satisfying! The last 2 days had me calking leaks that equalled nearly 1 square foot. The two rooms I worked in are now 3 degrees warmer. THAT is what this post is about.

Labels: , , , ,

Thursday, January 15, 2009

Use a Humidifier!


Have you ever been to AZ or NM in July? "Yeah, but it's a DRY heat." Uh huh. They're right, and it's still HOT.

But in the desert, as hot as the days are, the nights are cold. Fires built for warmth hardly feel as if they're burning. Why? Because there is no moisture in the air.

Living in a humid environment has taught us the water in the air holds heat. So why do so many of us refuse humidifiers in the winter? When I lived in TX, humidifiers were non-existent. People thought the moisture would make them sick and their houses feel clammy. I finally convinced my manager to disconnect his dryer vent and put a filter on it for his humidifier. His daughter was healthy for the first winter of her short 3-year life. His conversion to belief in humidifiers brough other co-workers around and life was much improved at work.

My room mate in TX, however, was a harder sell. We finally rerouted the dryer vent into the house - not for our benefit of course, but for the hard wood paneling. Being much more comfortable at a lower thermostat setting was only grudgingly admitted.

Oddly, back up here in upstate NY, it can be a similar battle. I truly don't understand why, for our heating season is so long that anything which can improve it should be seized upon instantly. And so, I once again hop on my soap box, extolling the virtues of a humidifier.

Air Exchanges
No matter how tightly sealed a house is, there is still a full air exchange at least once an hour. The average is 3 and can be as many as 6 (like my house). Since most houses are made of wood, this number of air exchanges increases or decreases with the moisture content of the wood. If the wood dries, it shrinks, creating gaps where air leaks both in and out. These leaks allow more cold - dry - air in and heated air out. You are wasting heat. And drying the air out even more since that cold air is dry air being heated, only becoming dryer (relatively speaking). The dries the wood out more, creating more and larger leaks.

As I write this, there's a snow storm brewing outside, so the relative humidity is high out there, 86% - for the temperature of 19 degrees F. But, calculating the indoor humidity without any humidifier running, it's only 12%. Since you want your indoor humidity 40%-50%, 12 is a bit low. Check yours here and go to the bottom of the page for your zip code.

Why Wood Needs A Humidifier
And so while you are needlessly heating all of those air exchanges, you are also creating a slow motion cycle similar to the freeze-thaw of the roads. We all know far too well what happens when roads go through these for just 1 season - buckling and pot holes. Well, over several seasons of desert dry air in the winter, followed by rain forest humidity in the summer, the wood in your home starts to bend and warp and buckle, causing joists to heave, nails to pop through plaster, plaster cracking, doors not closing, loose joints in chairs, peeling veneers and ruined antiques.

Why Your Body Needs A Humidifier
If all of this is happening to your house, what is happening to your body? You lose up to a gallon of water a day with normal breathing and sweating. Your skin is a permeable cover - meaning it leaks water - which is why your body creates oils to try to seal the leaks and keep the water in.. It's also why your skin is so dry in the winter. Everything dries out faster in dry air - including your skin and the rest of your body.

Just as importantly, your eyes, mouth, nose, throat and lungs have a more difficult time retaining their moisture, cuasing your body to dehydrate that much faster. The air is supposed to be 100% humid by the time it reaches the lungs, which causes your sinuses, nose and throat to all dry out very rapidly, and make you lose that much more moisture through your breathing.

Because your nose, sinuses and throat are all just trying to stay moist for breathing, there isn't enough moisture to flush contaminants like bacteria or allergens out. This allows infections to take hold, for allergies to flare up, and for your sinuses to become a virtual swamp, rather than its normal clear-running stream.

Why Your Heat Bill Needs A Humidifier

It's a simple issue of comfort. Or is it? Humid air feels warm and IS warmer - holding heat longer - like so many microscopic radiant heaters. Why sit in chilling misery with yet another cold or sinus infection; feeling that NW wind blow across you each time it hits the house?

If you think you can't afford a humidifier, let's talk numbers. Since 2004, electric has gone up about 6%, or 1 penny. Natural gas has gone up 40%-50%. Buy humidifying your home to 30% (still on the dry side), you'll increase your electric use by about 3%, but you can reduce your natural gas by 4%-12%. Statistics show that each 10% jump in humidity feels like a full degree in warmth. I kind of think it's more like a 5% increase - with how our house feels going from 30% to 40% RH at 70 degrees. But, going with the 10% number, you can feel more comfortable with your heat turned down 2 or 3 more degrees just by getting the humidity up to 30%.

This type of savings doesn't include you having to contend with loss of work due to illness, decreased home value from the years of the wood heaving or the quality of life that has improved dramatically - which can be the most precious of all, particularly for those with allergies and asthma.

How To Humidify

Do yourself a favor, get and use a humidifier.
Forced air systems can have a whole-house version installed directly in the system. It's initial price is high, but over the life of the system, costs much less and you don't have the daily ritual of filling the humidifier.

Hot water baseboard needs a portable type system, which comes in a variety of styles:

Hot mist
Cold mist
Ultrasonic
Fan Forced
Passive
Active

It can be confusing. We go for the quietest. Which means we have several. (pictures are in the order listed below)
1 on the wood stove that acts as a passive unit. The stove heats the water and it just evaporates.
1 in the dining room is a fan forced with 5 different fan speeds.
1 on the second floor which is a hot mist.
And finally, our electric dryer with a filter attached to the end of the house. This isn't the permanent fixture, but will become permanent in the summer with an attachment designed specifically for this purpose.

None of these pose a significant addition to the work load of the house, the noise factor or humidity. But the combination keeps the house at about 30%-35% RH with virtually no sound - a true blessing!

Labels: , , ,

Friday, January 2, 2009

Geothermal Heat for Upstate NY

Sent to me by ArtCaLight

Most people think of geothermal energy as a form of energy that can only be used in certain geologically active areas and under special circumstances. But ground source heat pumps are a type of geothermal energy technology that can be utilized almost anywhere.

According to the California Energy Commission (CEC), the cost of a ground source heat pump can be cheaper than conventional systems if incorporated into the initial financing of the house. If added on afterwards, the cost is comparable to the average cost of a kitchen or bathroom renovation in the United States. What is more, an add-on geothermal heat pump will pay for itself over time in reduced utility costs.

The simple principle behind the efficiency of the ground source heat pump is that the temperature below the ground remains relatively constant no matter how extreme the surface air temperature is. This can be seen in caves and cellars. The temperature in Mammoth Cave in the United States, as reported by the National Park Service on the Mammoth Cave Web site, remains about 54 degrees Fahrenheit (12 degrees Celsius) year round.

The CEC states that the temperature of the ground six feet below a house is likely to be between 45 and 75 degrees Fahrenheit (7 to 24 degrees Celsius), no matter whether the house is in Yakutsk, Russia or Bangkok, Thailand.

What this means is that the heat pump does not have to work very hard to cool off the air in the house in summer or heat it up in winter. As the house air passes through the system into the ground, the constant ground temperature provides 70 percent of the energy to operate the system, and this energy is "renewable," which means for the homeowner it is free.

Since they have no condensing units, geothermal heat pumps are also quiet relative to other heating and cooling (HVAC) technologies. Because most of the system is below the ground, it is not subject to weather damage. Other than the unit itself, the system has a conventional design for pumping air through the house. Surveys show that homeowners who have used them tend to like them and recommend them to others.

The CEC reports that the total upfront cost for installing a geothermal heating and cooling system could range from $17,500 to $37,500 for a "typically sized" home. But if the homeowner purchases an Energy Efficiency Mortgage, prior to installing the system, the system could actually save money from the start. Even in the absence of such financing, the system could end up paying for itself in energy savings within a few years.

Geothermal heat pumps are an underutilized technology in the US, but the CEC thinks this is mainly because most people are unaware of the benefits of owning one. If ground source heat pumps should become widespread, they could save consumers a considerable amount of money per year in energy bills and substantially reduce greenhouse gas emissions

Labels: , , ,

Sunday, September 28, 2008

Conserving At Home

Heating and Air Conditioning
Why You Insulate
Wood Burning
Homemade Solar Heater
Steps To Save Natural Gas
Fuel Oil Bill Assistance

Saving Gasoline
Become A Hyper-miler
Green Car Information
Bio Fuel and Other Information

Holidays and Special Occasions
A Green Halloween
Green Weddings
Green Christmas

Electric Savings
LED Solar Chandalier Project
Electronic Vampires
Reduce Your Home's Electric Use
WSJ Article on Energy Star Appliances
Drying Your Clothes
Refrigerator Madness

Reduce Your Water Needs
Irrigation Conservation
Greywater Use - will be expanded upon

Reducing Your Footprint and Bills
Don't Buy Bottled Water
Stop Using Fabric Softener
Non-Clay Kitty Litter Reviews
NYS Locavore Information
Compost!
Paper Towels
Green Cleaning
Recycling VHS Tapes
Protect Your Pollinators
Quit Using Air Freshners

Teaching The Kids

Gardens At School

Labels: , , , , , ,

Wednesday, September 3, 2008

Shopping For A Pellet Stove

I'm shopping for a pellet stove.

I didn't want to this year, but because the Solar Heater BROKE, I have to have some form of heat out in the work shed. I can't let that machine sit idle another year. It was way too pricey to just collect dust.

So anyway, the solar heater was supposed to get us through the beginning and ends of the heating seasons, and hopefully through it all, eliminating the need for any other heat source. With it being trashed for at least this year due to my autumn vertigo starting up, I need another heat source.

Sigh.

So, I stopped at a local HVAC place that sells all sorts of stoves - nat gas, wood, coal, pellet. They have a single pellet stove. Breckwell The Big E. Never mind that it would heat 2 of our houses, much less the 300 sf of the shed, it's the only one they sell. I'd prefer a bit more selection.

And then, I get the numbers. Meow wow. Forget how much it burns per day that would be completely wasted. 800 to install? 325 for the most basic hearth pad? 2600 for the stove itself?

I started shopping elsewhere.

I didn't find any good reviews of this particular stove, so am not inclined to buy it anyway. But if I were, I'd be buying it online. I found it for 1950, with free shipping. All of the stuff that goes with it - thermostat and pipes, I found for far less than the combined difference in price plus their install. The only thing that was nearly identical in price was the hearth pad.

So I've emailed a second "local" store. Not one I can just drive to and look around and drive home without getting dizzy for a week, but close enough. They have a huge selection. Plus, steered me to two different makes that would work well. I checked them out, found reviews, and have pretty much made up my mind which one. It's a Dansons Glow Boy. It has a much smaller maximum btu hourly rate, and a lower starting btu rate. That's good. Far less waste.

Now all we have to do is get down there to buy it. That'll have to wait until my sister comes up to visit the middle of this month. If I wait for Mom, she'll procrastinate until they're all sold out. She wants something else. What else, no one really knows - including here. But because it wasn't her idea, she doesn't want the pellet stove. Too bad. I'm buying, so I'm choosing. And I'm the one who will be maintaining, so I'm choosing.

I've decided - The Dansons Glow Boy. More good reviews.

Labels: , ,